Getting Started, What You Really Need to Begin a Yoga Practice (Hint: it's not Flexibility)

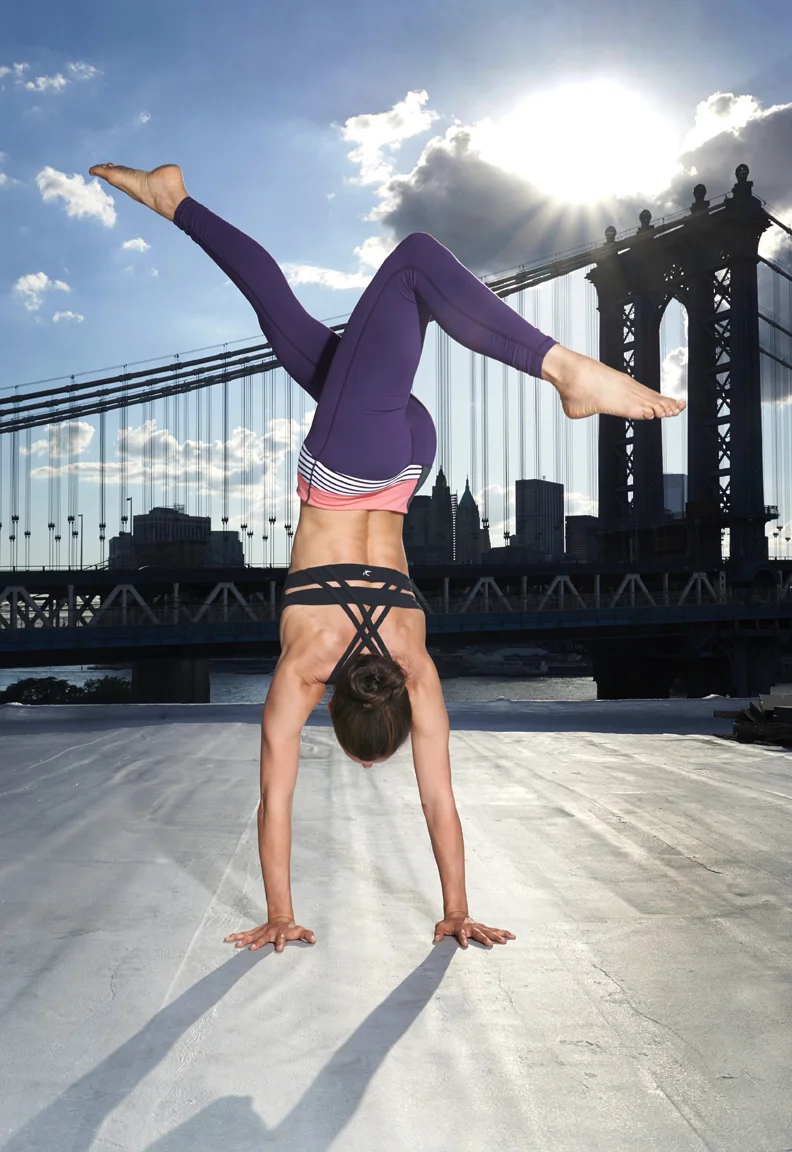
‘I’m not flexible, I can’t practice yoga’ – does that sound familiar?  Despite all of the bendy and twisty photos you may have seen, the truth is that you don’t have to be flexible, or able to stand on your head, to practice yoga.  In fact, being inflexible is one of the best reasons to begin a practice.  Most of us aren’t born with the ability to touch our toes to our heads or balance on our hands, but with time, patience, and practice, you can develop the strength and flexibility to get there.  All you really need is an open mind and the willingness to try. 

So how do you go about getting started?  The first step is learning about the different styles of yoga and then deciding which one is the best fit for your needs.  Below is a breakdown of some popular yoga styles:

1.      Ashtanga – a rigorous style that follows a specific sequence of postures, always practiced in the same order.  Try this if you’re looking for a physically demanding practice, and enjoy routine.

2.      Bikram – includes a series of 26 postures (again, always in the same order) performed in a room heated to 104 degrees Fahrenheit with 40% humidity.  Give this 90-minute practice a go if you love the heat and are prepared to sweat buckets.

3.      Hatha – a broad term referring to any practice that includes yoga postures.  In general, a class labeled as Hatha includes basic yoga postures, and isn’t too rigorous.  If you’re looking for a more moderate practice, this is a good place to start.

4.      Hot Yoga – similar to Bikram in that the room is heated, but different in the sequence of postures.  Try this style if you want to sweat a lot but are looking for a deviation from the classic Bikram class.

5.      Restorative –A restorative class is both relaxing and revitalizing, but requires no effort to get into or stay in each pose.  Props like bolsters, blankets, and blocks are used to support the body in a series of passive stretches.  If you’re looking for something mellow and tranquil, this is it.

6.      Vinyasa – literally meaning ‘flow’, vinyasa classes will have you moving fluidly from pose to pose with a focus on the breath.  The sequence of postures is almost never identical from class to class.  Give this style a try if you like a challenge but dislike routine.

Once you’ve decided on a style, the next step is determining where to practice.  As a beginner, it’s always ideal to start out in a private or group class, where a teacher can provide guidance and give hands-on adjustments.  Also, there are little to no interruptions in a classroom, unlike a home-practice.  But if the cost of a studio is a deterrent, there are a number of fantastic resources available online which provide virtual classes taught by highly qualified teachers.  Monthly memberships to these websites are often equivalent to the price of a single class at a studio. 

What you’ll need for class: comfortable clothing and a yoga mat.  The mat doesn’t have to be expensive, it’s there to provide cushioning and traction while you move into and out of the postures.  Some studios provide mats, but it’s nice to have your own, especially if you plan on practicing at home.  As for props like blocks and straps, those are generally provided by the studio, but if you’re doing a home practice it’s not a bad idea to have these helpful items on hand. 

Congratulations, you're almost ready to begin.  The last, and perhaps most essential thing to have, is the right attitude.  Being open-minded and eager to learn are far more important than the brand of your yoga mat.  Realize that the practice will be challenging, humbling, and also rewarding.  Don’t compare yourself to others, and allow yourself to enjoy the process of learning. 

Get Twisted: Why Yoga Twists are so Beneficial

A twist in yoga is a pose that involves spinal rotation, i.e. when the shoulder girdle turns in an opposing direction to the hips.  Twists can be done while standing, seated, or lying down, and when performed properly, are very energizing and healing.  Here are a few great reasons to start adding more twists to your yoga practice:

 1.   Improve Spinal Health – Twisting postures build strength and flexibility in the muscles that support our spine, helping to retain and restore the body’s natural range of motion.  Rotating the torso also stretches the shoulders, hips, and neck, all of which prevent stiffness and hardening of the joints.

2.   Aids Digestion – Twisting creates movement in and around our digestive organs.  By alternately compressing and stretching that area, circulation to the digestive organs is increased, thereby improving their functionality.

3.   Detoxifying – Other abdominal organs including the liver and kidneys are also stimulated while twisting.  This movement encourages the body’s natural detoxification process, promoting cleansing on a cellular level.


Below are a few of my favorite twists.  As always, those with injuries and limitations should speak to their doctor before attempting any of these poses.

Ardha Matsyendrasana (Half Lord of the Fishes Pose):

1. Begin in a seated position with your knees bent and feet in front of you.

Ardha Matsyendrasana

Ardha Matsyendrasana

2. Slide your left foot under your right leg so that the leg is resting on the floor, and the ankle sits near the outside of your right hip.  Lift the right foot over the left leg bringing the right knee pointed upward toward the ceiling, and the bottom of the foot resting on the floor outside of your left hip.

3. Lengthen through the spine and twist toward the right. The the right hand should be pressing into the floor behind you, as the left upper arm moves to the outside of your right thigh.  Make sure to distribute the twist throughtout the entire spine, and not just in the low back. 

4.  Hold for 10 to 20 breaths, then release and repeat on the opposite side for the same length of time.

Parivrtta Parsvakonasana (Revolved Side Angle Pose variation):

1.  From Downward Facing Dog step your right foot forward to a high lunge.

Parivrtta Parsvakonasana variation

Parivrtta Parsvakonasana variation

2. Bring your hands to prayer pose, and then extend through the spine as you begin to lean forward.  

3.  Bring your left elbow to the outside of your right knee. Keep your left leg active by pressing firmly into the left heel.

4. Hold the pose for 10 to 20 breaths, then release and repeat on the opposite side for the same length of time.


7 Poses to Help Open Your Heart & Deepen Your Backbend

Many heart-opening postures also happen to be backbends.  Because the low back tends to be the most flexible part of the spine, it’s important to emphasize opening the heart by incorporating the bend into the upper and middle areas of the back.  Repeated crunching in the lumbar region of the spine can result in injury over time.   Below are some poses and pointers to help open your heart, lengthen your spine, and deepen your backbend.  As always, those with injuries and limitations should speak to their doctor before attempting any deep bends.

Open the chest:

1.  Cat/Cow Stretch – Move with the breath and try to visualize extending the spine from the top of the head all the way down to the tailbone.

2.  Bhujangasana (Cobra pose) – Emphasize rolling your shoulders down and firming the shoulder blades against the back in the pose.

3.  Setu Bandha Sarvangasana (Bridge pose) – Firm your outer arms, lengthen the tailbone, and tuck your shoulders underneath you to really open the heart here.

·Stretch the arms and shoulders:

4.  Urdhva Mukha Svanasana (Upward Facing Dog pose) – Roll your shoulders back and down before fully moving into this pose.  Emphasize lifting the chest to avoid sinking in the low back.

5.  Dolphin pose – Press the forearms actively into the floor. Firm and widen the shoulder blades away from the spine and down toward the tailbone to accentuate the shoulder stretch.

Deepen the bend and strengthen the back:

6.  Salabhasana (Locust pose) – Clasp the hands behind you and press the scapulas into your back to open the chest and shoulders.  Raise your arms, legs, and upper torso off of the floor to strengthen the spine.

Open the hip flexors and quads to stretch the whole front body:

7.  Anjaneyasana (Low lunge pose) – Lift the chest and draw the tailbone down.  Focus on incorporating the backbend into your upper back and avoid crunching in the lumbar as you reach up with the arms.  

10 Reasons to get Upside Down Everyday

An inversion in yoga is a posture where the head is positioned below the heart.  Most of the time we think of these as advanced poses, such as handstand or shoulder stand, however there are more accessible and gentler variations you can take.  Asanas like Downward Dog and Legs up the wall are considered inversions and will give you many of the same benefits as the more advanced postures.  Those with injuries and limitations such as high blood pressure should speak to their doctor before attempting any inversions.

10 Reasons to Get Upside Down:

1.       Encourages Blood Circulation – gravity does the work by promoting fresh blood flow throughout the entire body.

2.     Improves Concentration – oxygen to the brain is increased, leaving us feeling invigorated and more alert.

3.      Strengthens the Immune System – getting upside down helps the body release toxins and bacteria which are eliminated by the lymph nodes.

4.      Alleviates Mild Back Pain – inversions help the spine to decompress, relieving pressure and easing back pain.

5.      Strengthens Your Core – the inner abdominal muscles are required to get into, out of, and to hold many unsupported inversions.

6.      Relaxing – legs ups the wall and other cooling inversions help calm the nervous system, reduce stress, and create a sense of serenity.

7.      Builds Confidence – facing our fears teaches us to overcome our reservations, and accomplishing new things is highly rewarding.

8.      Increases Body Awareness – moving into unique postures forces us to be more conscious of our body in space.

9.      Provides a New Perspective – getting upside down literally changes our viewpoint and gives us a fresh outlook in other aspects of our lives.

10.  Mood Boosting – Inversions are fun!  Once you become more comfortable with inversions you can practice them anywhere and all of the time.  Practicing a headstand on the grass or handstands on the beach adds playfulness and joy to your everyday life.

Photo Shoot at The Green Building: a Glimpse into the Space and Behind-the-Scenes

Working as a creative director & yoga model integrates two of my greatest passions - yoga & creativity.  Part of the preparation for each photo shoot includes scouting for unique and standout locations.  While it can be fun to explore and visit new places, sometimes finding just the right spot for a project can be challenging.  So when I came across The Green Building in Brooklyn NY, I admit I may have gotten more than a little excited at the prospect of shooting there.

From the moment I laid eyes on this picturesque space I could see just how perfectly it would highlight the beauty of the asana (yoga pose).  And indeed it was easy capturing striking photos here - each angle of this rustic-modern, industrial chic space was stunning.  Original brick walls, soaring exposed beam ceilings, and four beautiful chandeliers are just some of the features of this building that dates back to 1889.


I also got to take some fun photos with these gorgeous LOVE letters (provided by Starling on Bond.)  And when the letter 'O' went for a lunch break, I had no problem filling in for him :)


Many thanks to the folks at the The Green Building and to the wonderful photographer, John F. Cooper, for making this shoot successful and lots of fun!

More info and booking for The Green Building here:  http://www.thegreenbuildingnyc.com/