Wrist Support: 5 Poses to Help Stretch & Strengthen your Wrists

Whether you're new to yoga, or a seasoned practitioner, there's a good chance you've experienced wrist tenderness at some point in your practice.  Many of the postures we regularly perform - Crow Pose, Wheel Pose, Chaturnaga, and even Downward Facing Dog - have us bearing weight in the delicate wrist joints.  Misalignment in these poses, or lack of necessary strength and flexibility, are some of the major reasons our wrists can feel sore during or after a practice. 

Poses that bear weight in the wrists

Poses that bear weight in the wrists

Incorporating targeted stretching & strengthening exercises into your routine is an effective way to alleviate wrist soreness and help prevent injury.  Below is a sequence of 5 poses to strengthen and mobilize your wrists as well as reduce tension in the surrounding areas (such as the hands, fingers, and forearms).

1. Wrist Circles

Wrist Circles

Wrist Circles

  • Curl your hand into a fist with your fingers wrapped over your thumbs.

  • Tightly clench your fists as you rotate your hands in a circular motion. Make the movements slow and deliberate, bringing your awareness to the muscles of your wrists.

  • Circle each wrist ten times before switching to the opposite direction.

2. Hand Under Foot Pose

  • From Mountain Pose begin to fold forward. Bend your knees as much as necessary so that your belly connects with your thighs.

  • Place your hands on the ground with your palms facing upward. Slide your hands under your feet until your toes are touching your wrists.

  • Play around in the pose by shifting your weight forward and pressing the toes into the muscular part of the palms. Your knees can remain bent, or you can straighten them for more of a challenge, if you feel comfortable doing so (make sure your hamstrings are properly warmed up first).

Hand Under Foot Pose (with bent knees)

Hand Under Foot Pose (with bent knees)

Hand Under Foot Pose

Hand Under Foot Pose

3. Upward Bound Finger Pose

Upward Bound Finger Pose

Upward Bound Finger Pose

  • Begin seated with your fingers snugly interlaced. Place the back of your hands on top of your head with the palms facing upward.

  • Slowly begin to straighten your arms as you raise them up toward the ceiling. Make sure to keep the muscles in your back and neck relaxed. If you feel any tightening in the shoulders, back, or neck, pause and soften them before continuing.

  • Once the arms are fully extended, slowly lower them back down so that your hands return to the top of your head with the palms facing upward.

  • Repeat this 5 times. You can also perform this exercise by extending your arms straight out in front of your chest, and then returning your arms back above your head.

4. Table Pose Wrist Stretch

Table Pose Wrist Stretch

Table Pose Wrist Stretch

  • Begin in Table pose, with the hands on the floor directly under your shoulders and the fingers pointing forward.

  • Slowly begin to rotate the hands outward in a semi circle until your fingers are pointing back towards your body.

  • Hold for 6-10 breaths. For a deeper stretch you can gently ease the hips back and shift more of your weight into your heels. You should feel a very deep opening in the wrists and forearms. Take care to only go as far as feels right for you.

5. Reverse Prayer Stretch (Phalen's Test)

Reverse Prayer Stretch

Reverse Prayer Stretch

  • Place the backs of his hands together at chest level, with both wrists completely flexed.

  • Press the hands firmly together (from the knuckles to the fingertips) for up to one minute.

  • NOTE: Pain or tingling along the inside of the wrist may be an indication of carpal tunnel syndrome (always consult a medical professional first if you're experiencing any unusual pain).

5 Poses to Help Prepare for Ardha Chandra Chapasana

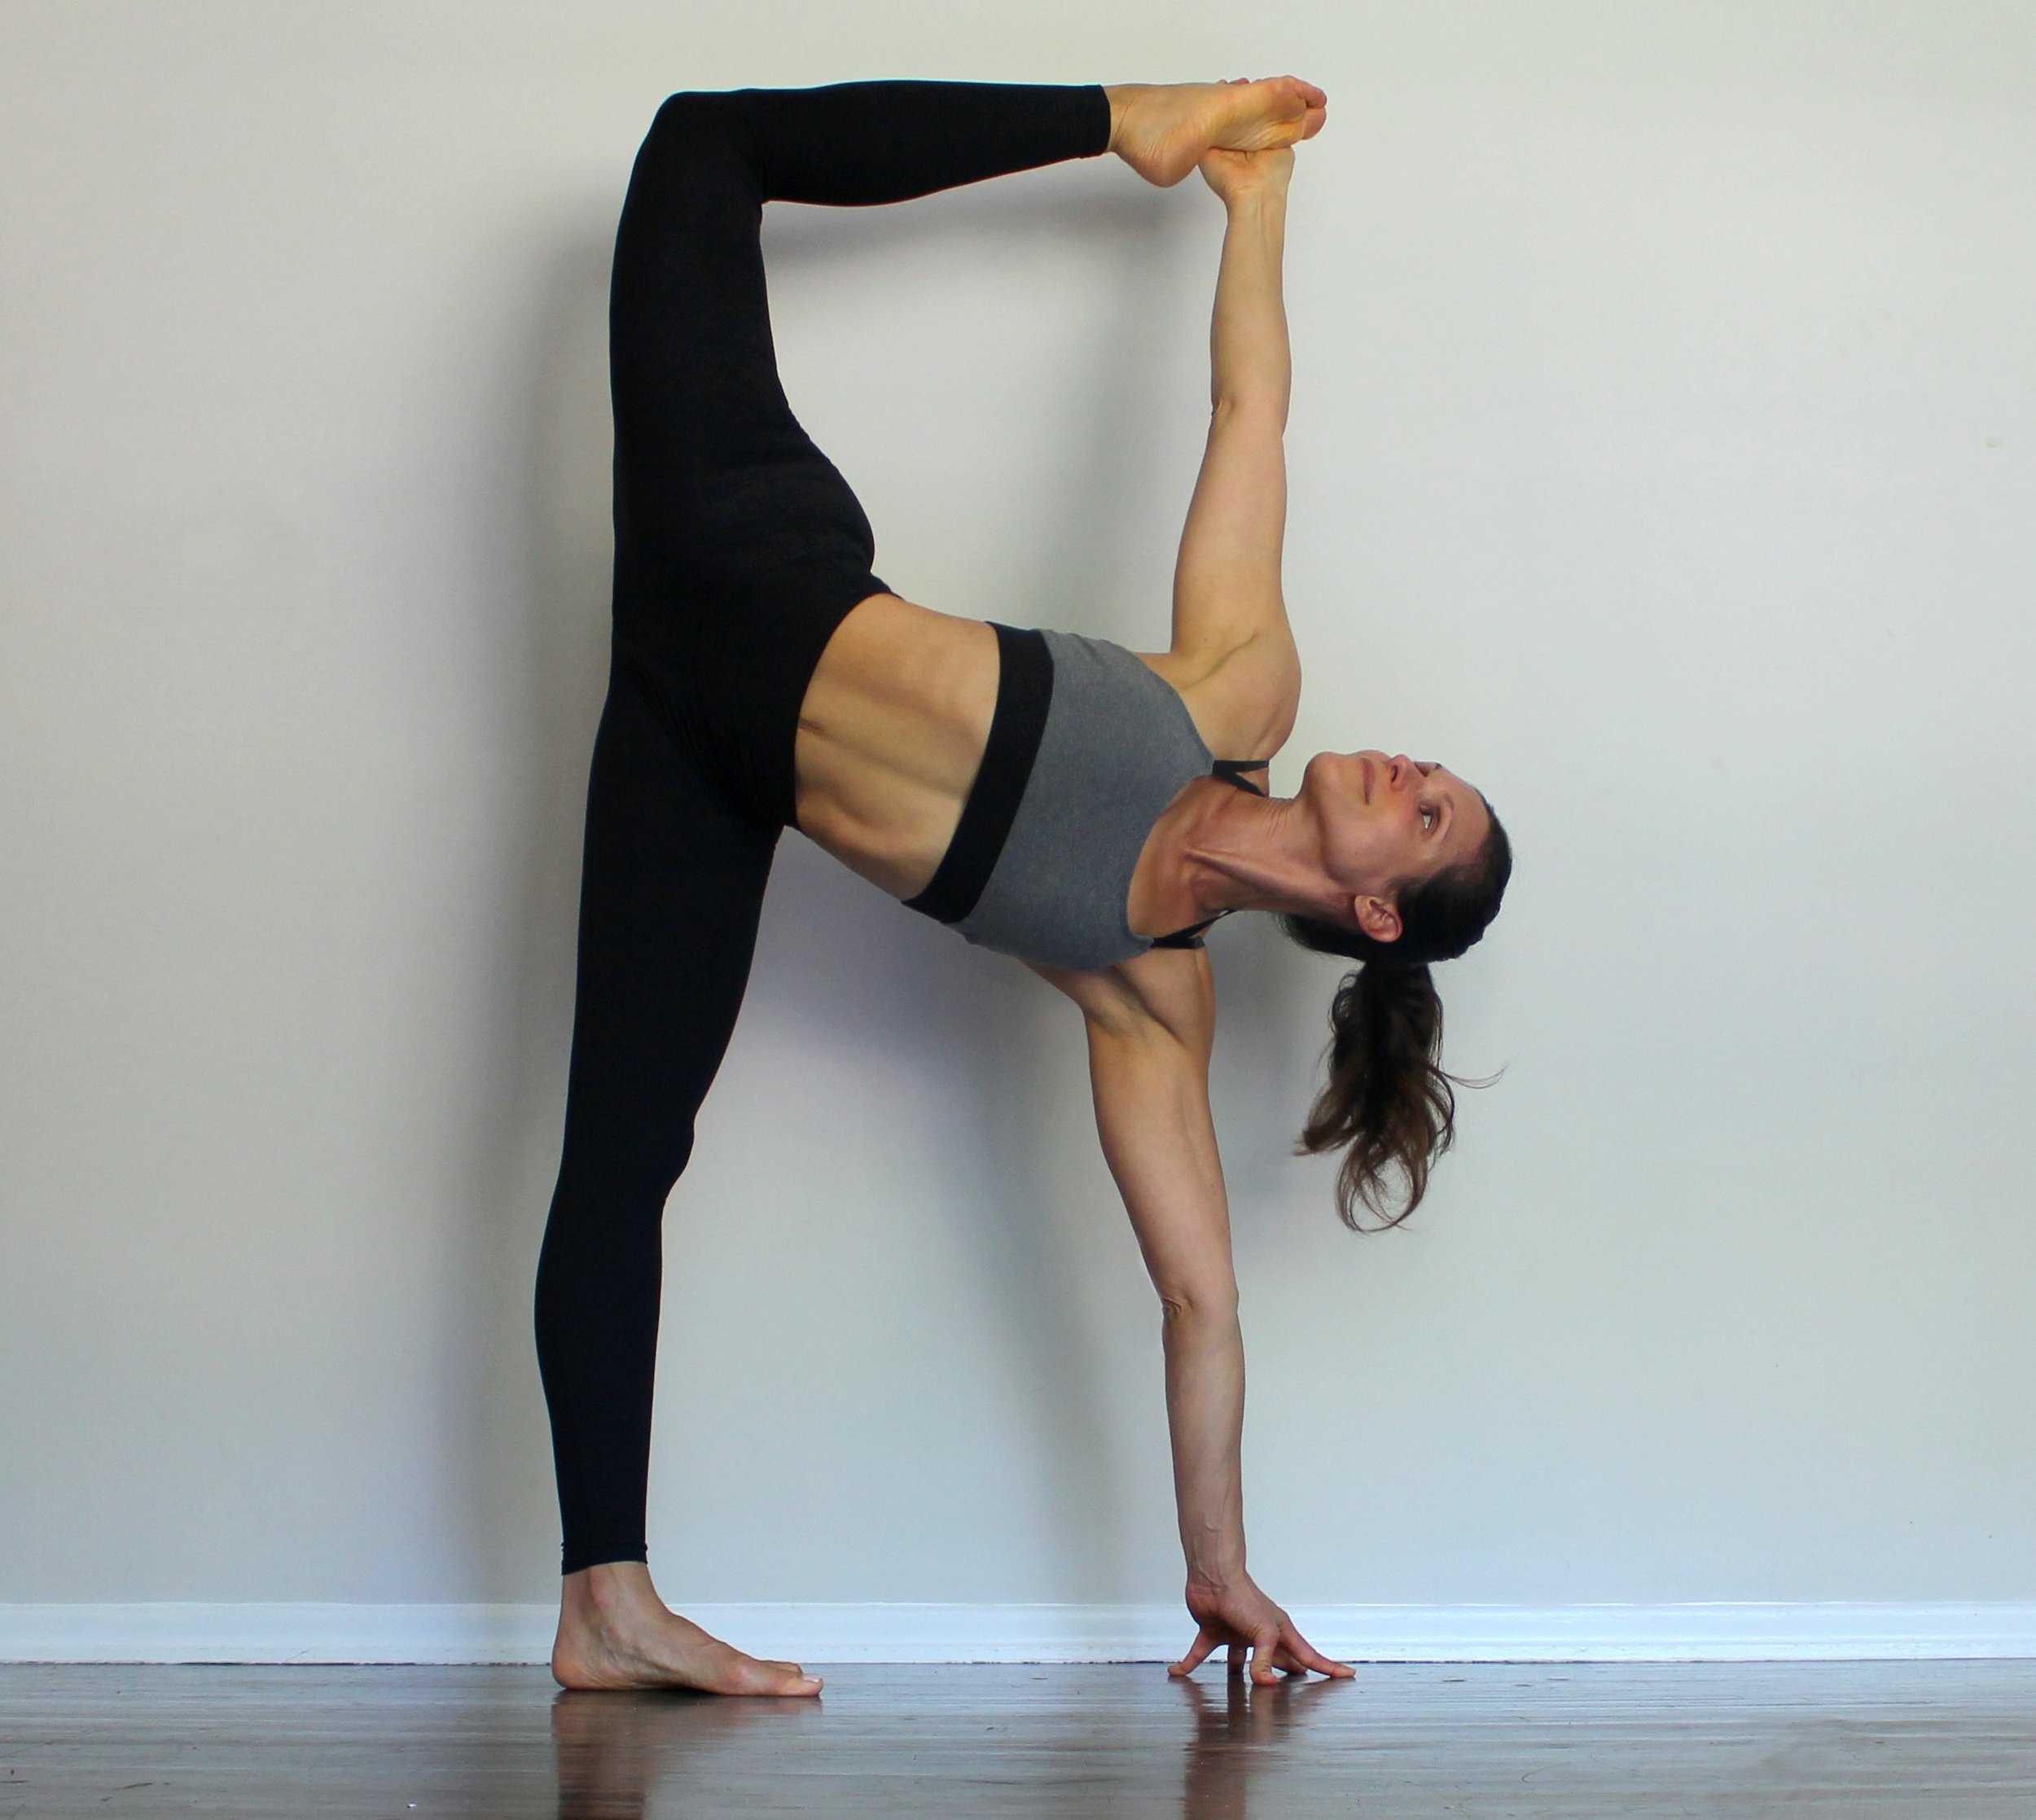
Ardha Chandra Chapasana, or 'Sugar Cane' pose, is a standing balancing with an asymmetrical backbend.  This variation of Half Moon Pose opens the psoas and hips, and lengthens the spine with a gentle twist.  The key to finding more ease in this challenging posture lies in properly warming up the body, and of course having a consistent practice.  After flowing through a few rounds of Sun Salutations, I like to deepen my warm-up with the following poses before moving into Chapasana.


IMG_2828_.jpg
IMG_2777.JPG

1. Three-Legged Downward Facing Dog

1. Come onto all fours, with your shoulders directly over your wrists and your hips over your knees.  Tuck your toes and straighten your legs, coming into Downward Facing Dog.

2. Step both feet together so that your big toes are touching.  Shift your weight into your hands and your left foot, and with an inhale raise your right leg up to the ceiling. Try to keep your hips squared, and your shoulders parallel with the ground.  Your ears should be in line with your arms, as you reach the crown of  your head toward the ground.

3. Hold for five breaths, then lower your right leg down, and repeat on the opposite side.

2. Uttanasana

1. Begin in Tadasana, with your hands on your hips.  Exhale and lengthen the front of your torso as you bend forward at the hips.

2. Press your heels down toward the floor as you reach your sit bones upward. Spin the tops of your thighs slightly inward. Don't lock your knees.  

3.  Keep your hips aligned over our ankles as you shift the weight of your body to the balls of your feet.  With each inhale lift and lengthen your torso.

4.  Hold the pose for 10 breaths.  To exit, place your hands on your hips and return to Tadasana with a straight spine.

3Extended Side Angle Pose

1. Begin in Warrior II pose, with left knee bent.  Lower the left elbow down to the left knee. Inhale the right arm up towards the ceiling and then exhale the arm over the right ear, creating a straight line with the right side of your body.

2.  Make sure the left knee stays bent directly over the left ankle.  Slowly sink the hips down towards the floor, and actively reach the right hand in the opposite direction of the right foot.

3. Hold for five breaths. To release, inhale reach the right fingers up and back into Warrior II. Repeat on the opposite side for the same length of time.

4. Runner's Stretch (Ardha Hanumanasana )

1. From Downward Facing Dog, step your right foot forward between your hands. Lower your left knee down onto your the ground, and un-tuck the top of the left foot.

2. Align your left hip over your left knee. Flex your right foot, pushing you heel away from you and reaching your toes back toward you.  Straighten your right leg as much as you comfortably can.

3.  Inhale and lengthen your spine.  Keeping your hips square, slowly begin to fold over your right leg while reaching your chest forward.

4.  Hold for 6 breaths.  To exit, tuck the left toes under, place the palms on the floor, and step back into Downward-Facing Dog.  Repeat on the opposite side for the same length of time.

5. Ardha Chandra Chapasana

1. From Warrior II pose, exhale and bring the left hand down in front of your left foot.  If you can't comfortably reach the floor, place a block under the hand.

2. Bring your right hand to your right hip, and begin to open your chest.  Slowly shift your weight into your left foot as you keep the toes spread wide.

3. With an inhale, lift the right leg up so that the inner thigh and inner arch of the foot are parallel with the floor. Find your stability here.

4. Open your right hip so it's stacked on top of your left, and open your torso toward your right.  Bend your right knee, and take a hold of your right foot with your right hand.  

5.  Ground down through your left leg.  Feel your ribcage expand as it lifts toward the sky.  Kick your foot into your hand so that your heel moves away from your seat while lifting your chest forward and up.  Once you find balance here, turn your gaze toward the sky. 

6.  Hold  for 3-5 deep breaths.  Slowly release and repeat on the other side.